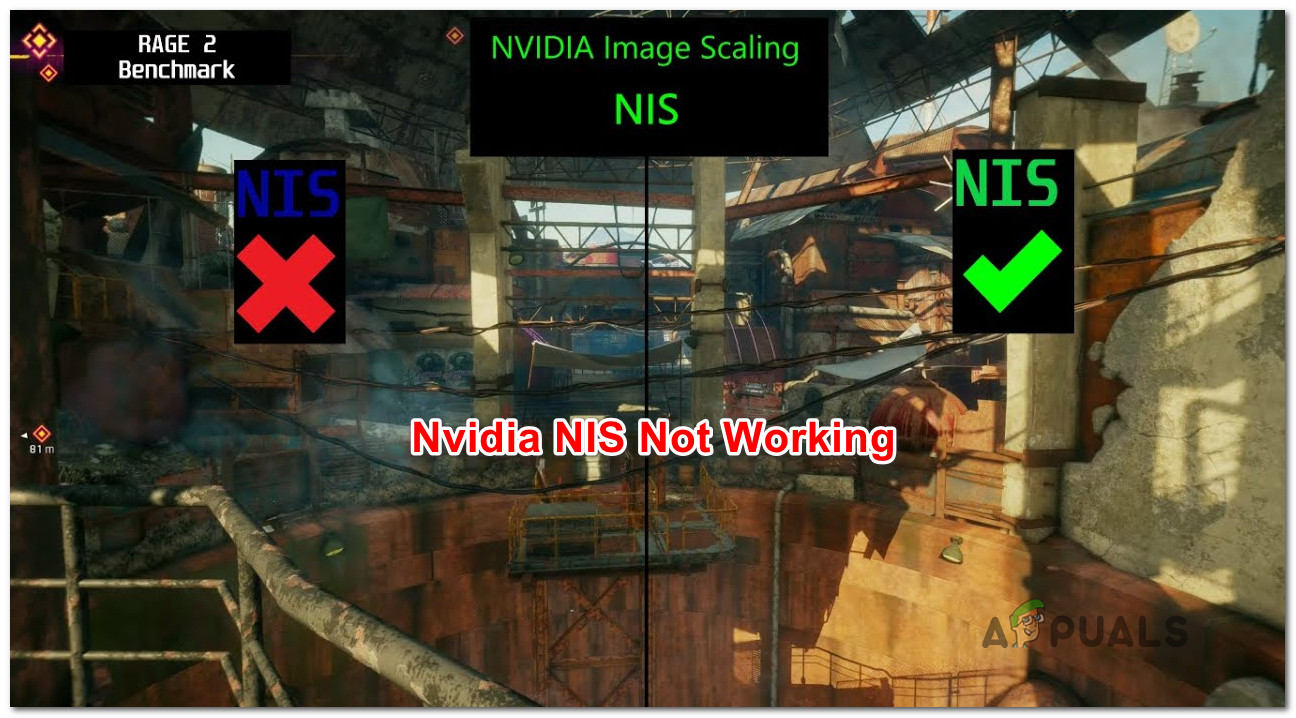
What is Nvidia NIS?
Nvidia Image Scaling (NIS) is one of the newest graphic innovations from the GPU manufacturer. It’s quite similar with similar image scaling features like DLSS (from Nvidia) and FidelityFX from AMD. The general consensus is that in its current state, NIS is not as good as DLSS, but it’s still a feature that will allow you to boost the in-game framerates (FPS) by rendering games at low resolution, then upscaling them to match the current monitor resolution. If you’re having trouble enabling Nvidia NIS on your PC, there are several potential causes that might be responsible. Here’s a list of potential culprits that you should troubleshoot against if you’re experiencing this issue:
1. Make sure that NIS is supported on your PC configuration
Keep in mind that even if Nvidia advertises that NIS will seamlessly enable on your GPU, in practicality that’s not the case. As you’ll see below, there are a series of limitations to Nvidia Image Scaling (NIS) – and not all of them are related to your GPU (some are display related). If you’re affected by one of them, you might not be able to utilize this feature on your PC. First, let’s cover the requirements:
NIS requires a display that is driven by an Nvidia GPU (the handling of the scan-out of the display needs to be done by an Nvidia GPU).If you are using an MSHybrid or Optimus configuration, you will need to set your notebook mode away from MSHybrid to discrete GPU mode in order to be able to enable Nvidia Image Scaling.NIS will only work when the game or application you’re running is configured to run in Full-Screen mode – NIS will remain disabled if the game or application is set to run in ‘fake fullscreen’ or borderless.If the game/app you’re attempting to use NIS on doesn’t support fullscreen mode, you can only enable Image Scaling by ensuring that the desktop resolution is the same as the game or app resolution.
Next, let’s cover the limitations of Nvidia Image Scaling:
Nvidia Image Scaling is not supported for Maxwell and Pascal GPUs when used in conjunction with HDR. Nvidia Image Scaling is not supported for Pre-Ampere GPUs if you use the YUV 420 color format.Nvidia Image Scaling is not supported for Pre-Pascal GPUS while using the YUV 422 color format.Nvidia Image Scaling is not supported in SLI Mode and Surround Multi-Monitor Clone / Duplicate mode. Nvidia Image Scaling is not supported in Title Display, Direct Display, VR, and Integer Scaling mode.
If you went through every requirement and limitation of Nvidia Image Scaling and none of them should affect your particular scenario, move down to the next method below.
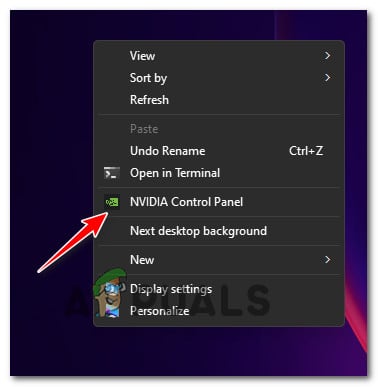
2. Enable NIS in Nvidia Control Panel or Ge-Force Experience
Once you’ve made sure that Nvidia Image Scaling is not hindered by any requirement that you don’t meet or by a limitation that applies to your particular legacy GPU, the next thing you should do is make sure that NIS is enabled from the Nvidia Control Panel menu. Note: NIS is actually a driver-based spacial upscaler and sharpener that works for the vast majority of GeForce GPUs for all games that support full-screen mode. It will work for all DirectX versions including DirectX 9, DirectX 10, DirectX 11, DirectX 12, Vulkan and OpenGL. However, you won’t see this feature starting automatically unless you begin by configuring it via Nvidia Control Panel or GeForce Experience. Since there are two ways of activating Nvidia Image Scaling on Windows PCs, we’ve created two different sub-guides that will walk you through the process of enabling NVidia Image Scaling on: Follow the sub-guide below that you feel most comfortable with:
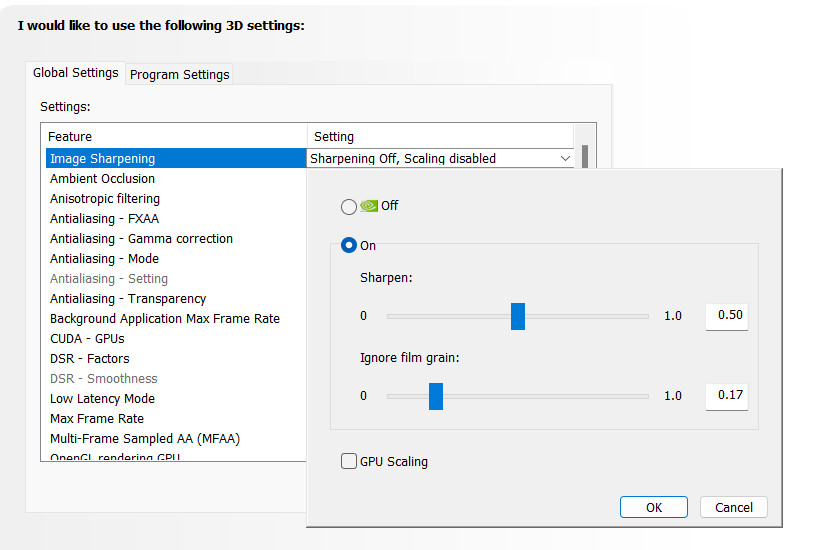
Enable NIS from Control Panel
This is the more rudimentary approach as you’ll have to make these changes manually to every resolution that you’ll use when upscaling via the NIS feature. Here’s what you need to do:
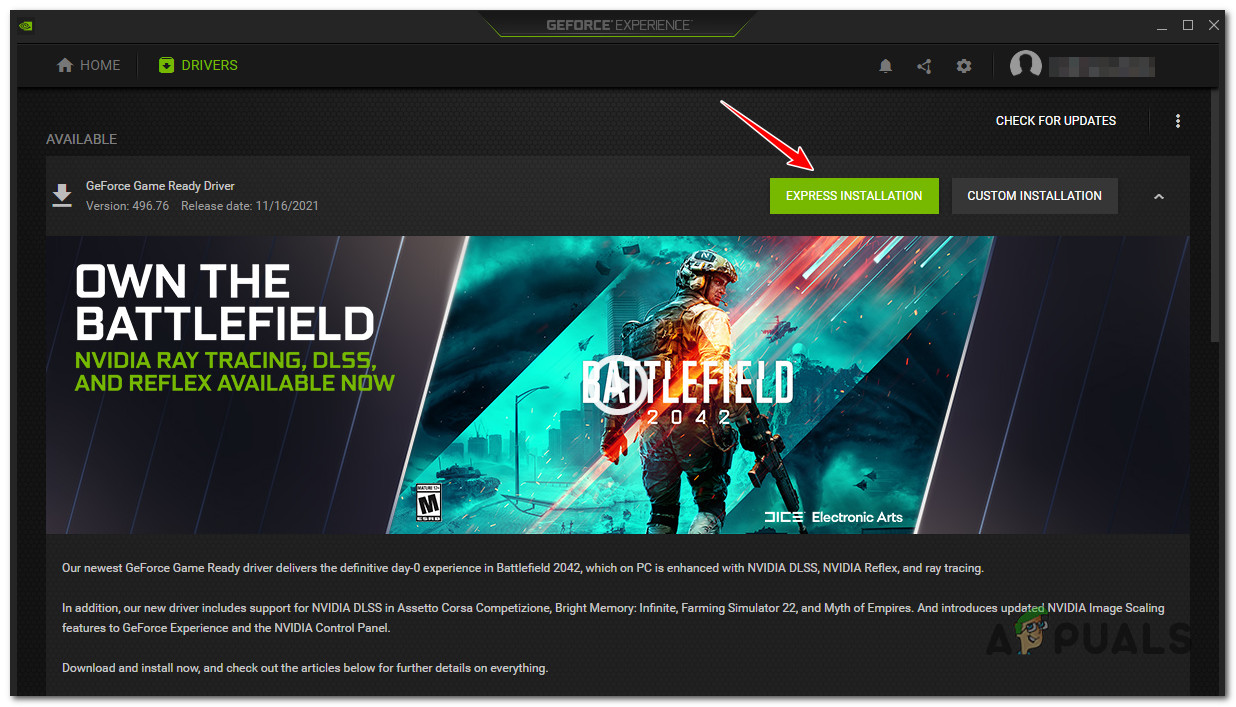
Enable NIS from GeForce Experience
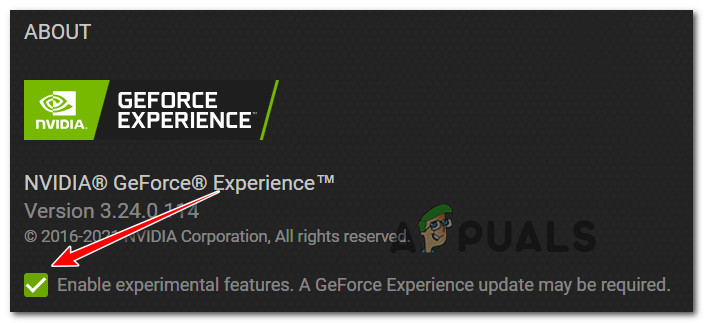
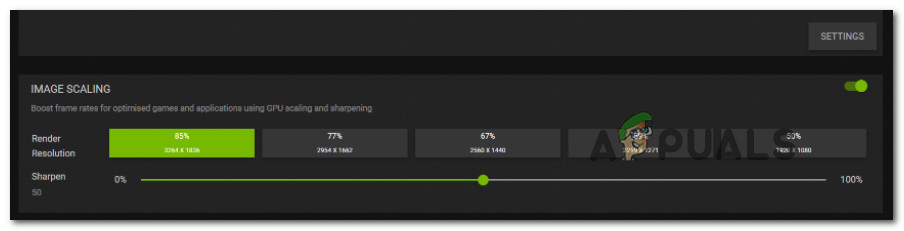
If you want an easier approach, you’ll be pleased to know that GeForce Experience automates the manual process of changing resolutions per game. On top of this, you can also use GeForce Experience to easily adjust the in-game sharpness slider for real-time customization. Follow the instructions below for the step-by-step guide to enabling NIS via GeForce Experience: Alternatively, you can also enable the NIS solution from the in-game menu (if the game supports it). By pressing Alt +F3 while playing the game, you can manually adjust the degree of sharpening during your gameplay sessions. This will enable you to spot the difference in image clarity between different values.
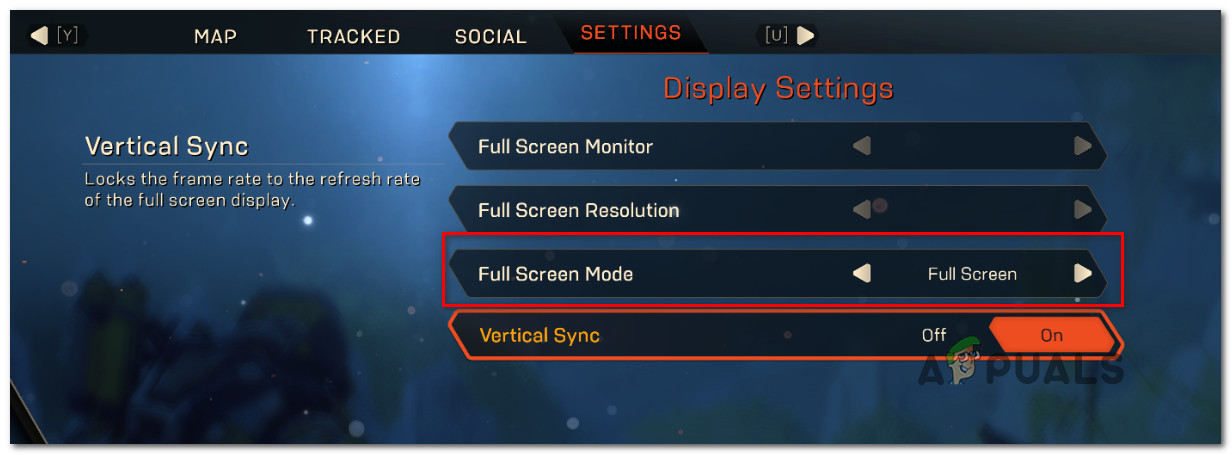
3. Set the game to Full-Screen mode
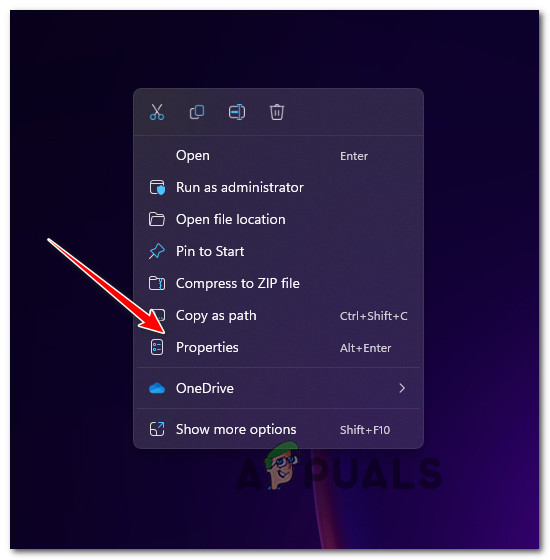
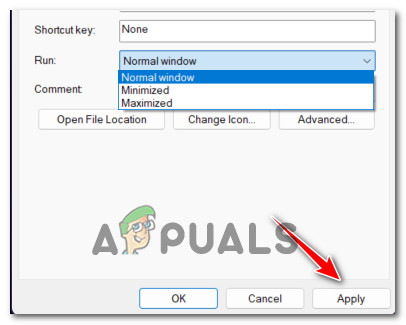
If none of the methods above have allowed you to enable NVIDIA Image scaling, you should proceed by ensuring that the game you are attempting to play via the NIS solution is actually running in full-screen mode. IMPORTANT: The Image Scaling feature will only work natively when the game is set to run in Full-Screen mode. You will not be able to get this NIS to enable automatically if the game is set to run in Borderless, Windowed, or Fake Full-screen mode. So in order to ensure that Nividia Image Scaling is made available, access the in-game settings and switch the game mode to Full Screen. Alternatively, you can force Full-Screen mode at the game executable level by doing the following: Note: Some game developers (particularly Microsoft studios) will actually use a modified (fake) version of fullscreen that’s actually borderless fullscreen. This is the preferred option for some game developers in order to facilitate seamless transitions when gamers use the Alt + Tab functionality. If the game you are attempting to play with NIS enabled uses ‘fake fullscreen’, the NIS feature will remain disabled unless the game and the desktop use the same resolutions. For step-by-step instructions on ensuring that the desktop resolution & in-game resolution are equal, follow the next method below.
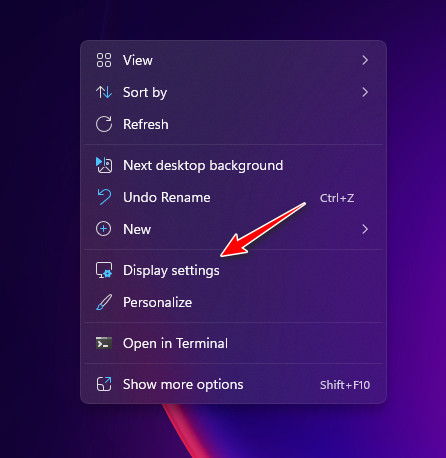
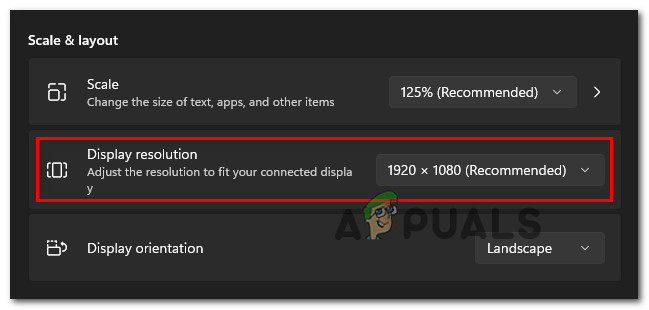
Set desktop resolution equal to the in-game resolution
In case the game you are attempting to play with NIVIDA Image scaling does not support the classic Full-Screen mode, the feature won’t start natively. In this case, the only way to force NIS into enabling itself is to make sure the resolution is the same as the in-game resolution. If none of the methods above worked in your case, this is the last resort method that won’t require you to get technical. Follow the instructions below to ensure that the desktop resolution and the in-game resolution are equal: In case the NIS functionality used to work but after an update, it no longer enables automatically, try the next method below.
5. Restore NIS after GPU Update (if applicable)
As it turns out, NIS (Nvidia Image Scaling) was partially discontinued for some NVIDIA GPUs after a driver update was released at the end of 2021. In case you followed every method above and none of them allowed you to enable the NIS functionality, there’s one more thing you can try. As some affected users have pointed out, you can actually get the old NIS functionality back even on GPU models where it’s deprecated by doing a small modification via Registry Editor. Note: If you decide to go for this method, our recommendation is to back up your Registry in advance. This will save you from reinstalling Windows in case you make a mistake during this procedure. Follow the instructions below to restore the NIS functionality for GPUs where it’s deprecated: If this method is not applicable as NIS is not deprecated in your situation, move down to the next method below.
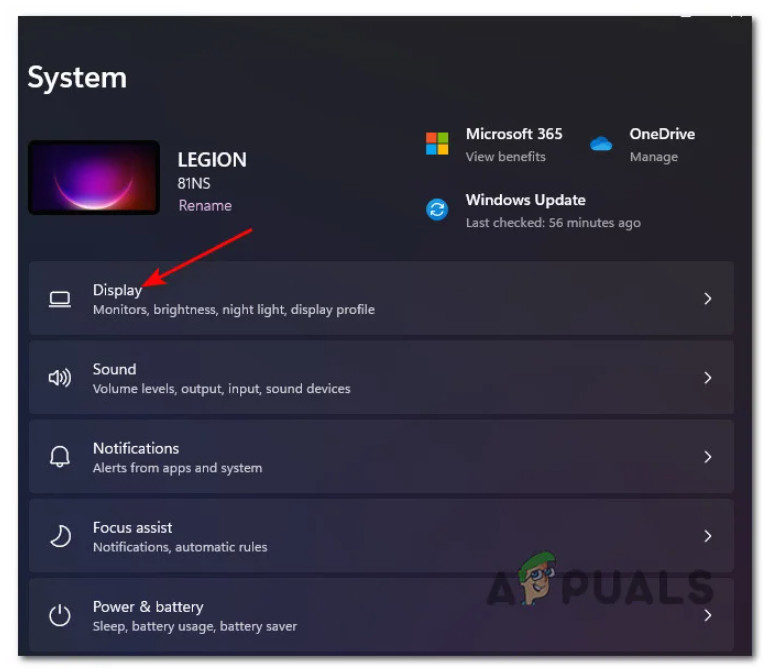
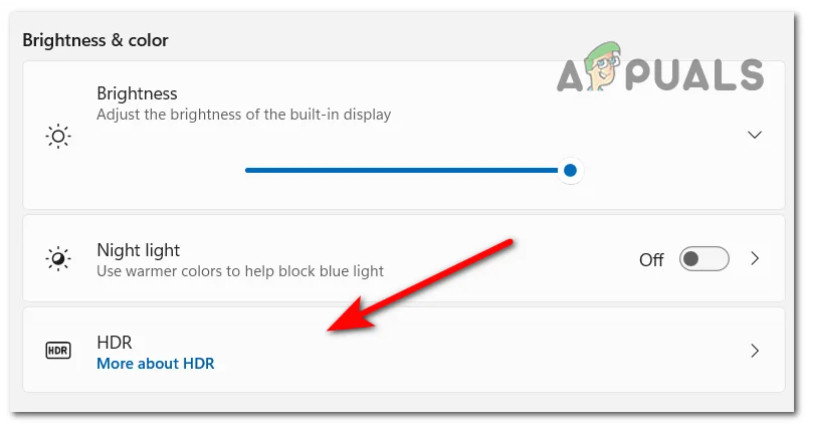
6. Disable HDR (if applicable)
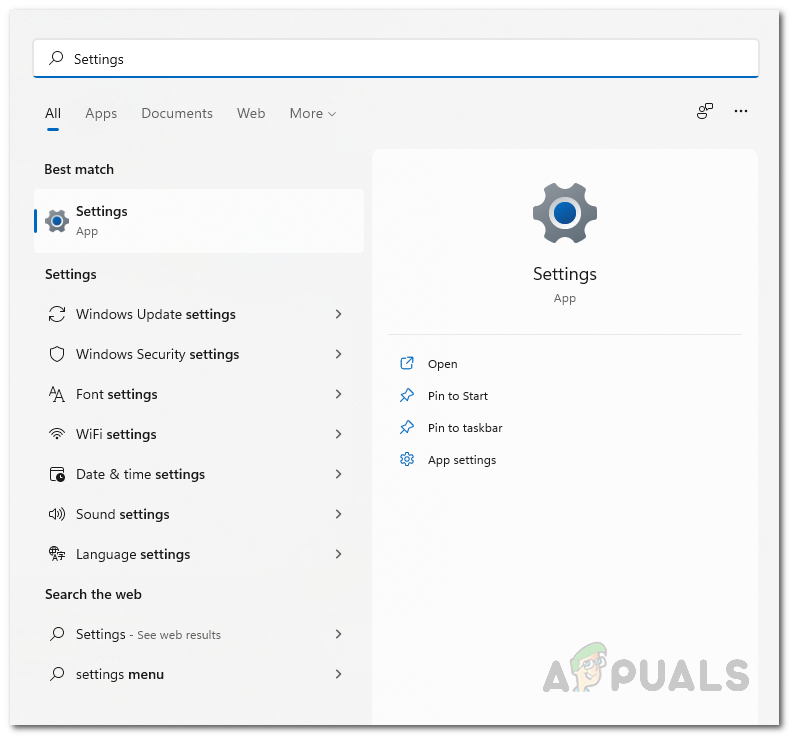
If the methods above haven’t fixed your screen flickering issue, HDR might be the problem. If you have a low-end display, partial HDR support might be causing this behavior. Some users who were also having this issue found that the NIS feature finally started automatically after they disabled HDR in the Settings menu. It seems that Nvidia Image Scaling can interfere with HDR in some cases. This varies depending on your GPU and display. If you think this might be the problem, try turning off HDR and see if NIS works properly. If you think this scenario applies to you and you have HDR enabled, follow the instructions below to turn it off and see if that solves the screen flickering issue: If this method didn’t fix the problem in your case, move down to the next potential fix below.
7. Disable Integer scaling
If you’ve come this far without a viable fix, another feature that you should investigate whether it’s conflicting with NIS (Nividia Image Scaling) is Integer Scaling. Note: Integer Scaling is a scaling method available on both Nvidia and AMD GPU that works by scaling low-resolution on-screen images from one pixel to four pixels or more. The result is a crisper, yet the still pixelated image that’s scaled up to fit the display. Although Integer Scaling should not be the preferred approach when gaming, this scaling technology still produces good results with legacy games. If you already have Integer Scaling enabled and you are looking for ways to enable NIS, chances are you’ll need to let go of one of them. Typically if you’re playing legacy games (classic games), you should use integer scaling. If you’re playing modern games, NIS is the better option in case DLSS is not an option for your GPU. If Integer Scaling is already enabled on your PC and you’re looking for a way to disable it in order to prevent a potential conflict with NIS, here’s what you need to do: If this method didn’t fix the problem in your case or this guide was not applicable, follow the next potential fix below.
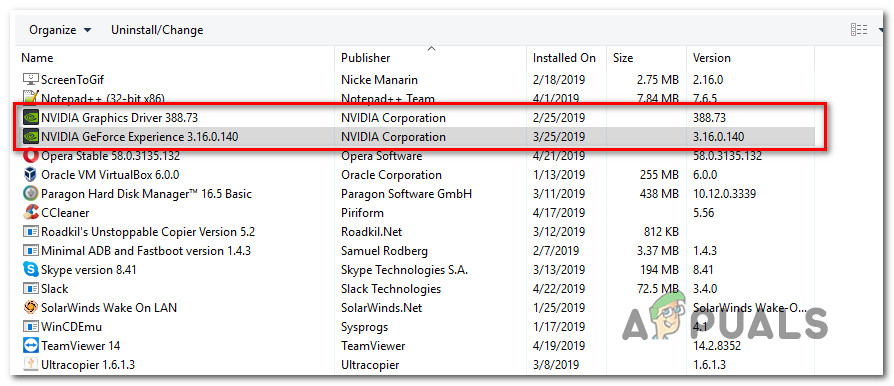
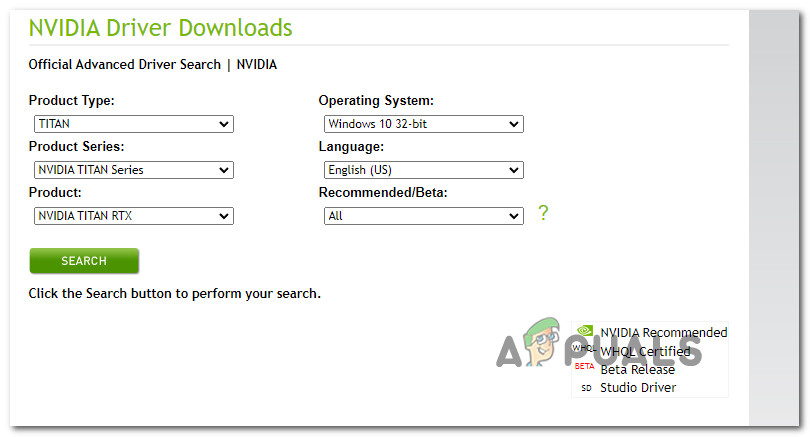
8. Update GPU Drivers & remove remnant data
This problem can also arise if you’re using an outdated or deprecated GPU driver that is incompatible with NIS. Many users who have experienced this issue have reported that the NVIDIA Image Scaling feature began working properly after they updated their driver to the latest version available. You might expect to start dealing with this issue after a false positive end up forcing your Antivirus to quarantine some files or dependencies belonging to the GPU driver or after you’ve neglected to update your GPU driver for a long time. Some users that we’re also having trouble getting the NIS feature to enable automatically for their Nvidia GPU have confirmed that the issue went away entirely after they uninstalled every Nvidia component, then used Display Driver Uninstaller + CCleaner (or similar tool) to remove any dependency before clean installing the latest compatible GPU driver version. If you’re looking for step-by-step instructions on how to do this, follow the instructions below: If the same kind of issue is still occurring despite uninstalling the latest driver (or you already had the latest version installed), move down to the final potential fix below.
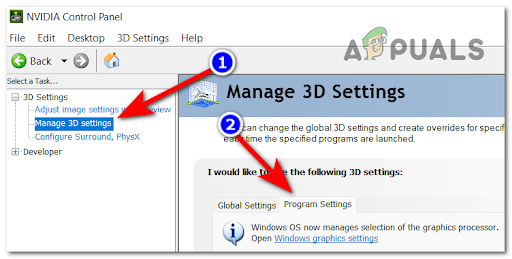
9. Force the game to be rendered in discrete mode
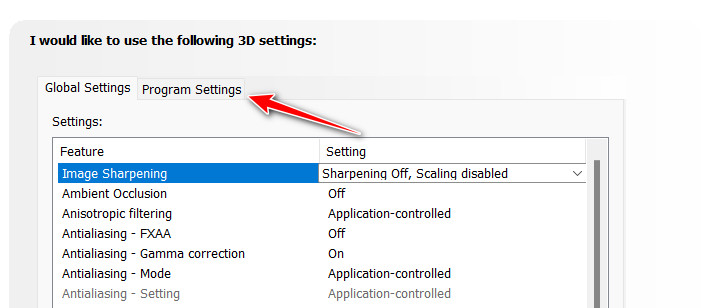
Before you write this scenario off as an impossibility, another potential explanation is that your PC is actually configured to run the game using integrated graphics rather than the NVIDIA discrete GPU. This might happen with certain older games. If that’s the case, you can fix the problem by changing the settings in the Nvidia Control panel to force it to use the dedicated GPU. It appears that this problem is quite common for users who are trying to start the game from a gaming laptop using an Nvidia dedicated GPU. In this case, the inability of NIS to start is most likely due to the fact that the Nvidia Control Panel is labeling the game executable as a utility app and decides to use the integrated GPU to run it (instead of the dedicated option). If this scenario applies to you, you can fix the problem by accessing your Nvidia Control Panel window, going to the 3D Settings menu, and forcing the usage of the dedicated GPU every time you launch that particular game: Here’s a quick guide on ensuring that you’re using the high-performance GPU for the game where NIS remains disabled: If the problem is still not resolved, move down to the next method below.
10. Disable Optimus (if applicable)
If you have Nvidia Optimus enabled on your PC and you don’t actually use it to switch between your GPUs, disabling it might resolve the issue automatically as many affected users have reported. Note: Nvidia Optimus is a proprietary Nvidia GPU switching technology that facilitates instantaneous and seamless switching between different GPU solutions while an application is opened. This technology is typically reserved for gaming laptops that have both an integrated (battery-saving GPU) and a dedicated (gaming GPU). While this technology is very good in theory, a lot of users are reporting that it ends up conflicting with the Nividia Image Scaling technology. If you have Nvidia Optimus enabled on your laptop and NIS insists on remaining disabled despite the fact that you tried every method above, try disabling the Optimus software and see if the problem is fixed. Now, depending on which gaming laptop you use, the instructions on disabling Optimus will be different. To make matters easier for you, we’ve put together a list of sub-guides that should guide you through this process.
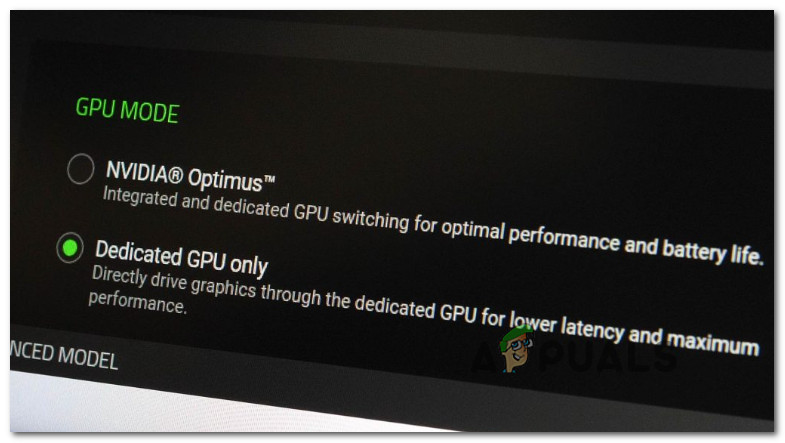
Razer Laptops
If you’re experiencing this issue on a Razer laptop, the way to disable Nvidia Optimus is via the Razer Synapse Software. Open it and go to the System menu at the top, then click on the Performance tab. Once you’re inside, change the setting under GPU mode to Dedicated GPU Only. Once you’ve made this change, a reboot is required in order to complete the process.
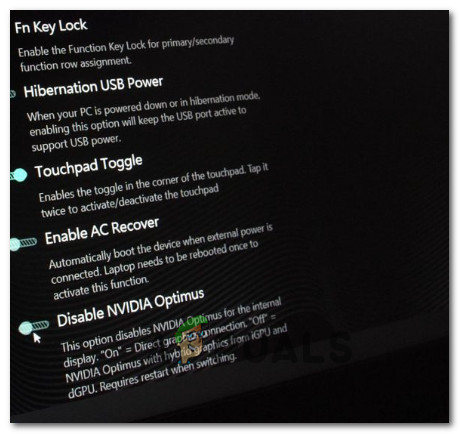
Tongfang / Eluktronics / XMG / Aftershock Laptops
All of these laptop brands use the same Control Center software. Among other things, you can use the Control Center software to access the General Settings and you’ll find an option named Disable Nvidia Optimus (among the bottom section of the screen. Once you make this change, reboot your PC in order to allow these changes to take effect.
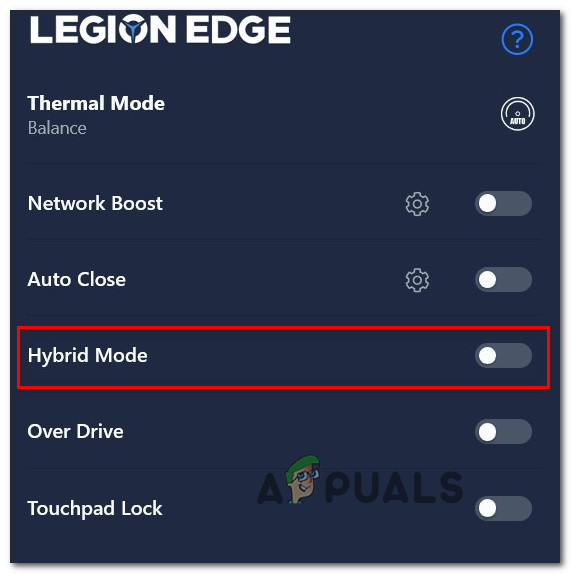
Lenovo Laptops
If you’re using a Lenovo laptop, you’ll need to use the Lenovo Vantage software in order to disable Nvidia Optimus. Open up the utility, then use the right-hand bar on the right section. This might be a bit confusing since the setting that allows you to disable Nvidia Optimus is actually called Hybrid Mode – Hybrid Mode OFF means that Nvidia Optimus is disabled. Once you have disabled Hybrid Mode (Nvidia Optimus) on your Lenovo laptop, reboot your PC and allow the changes to take effect.
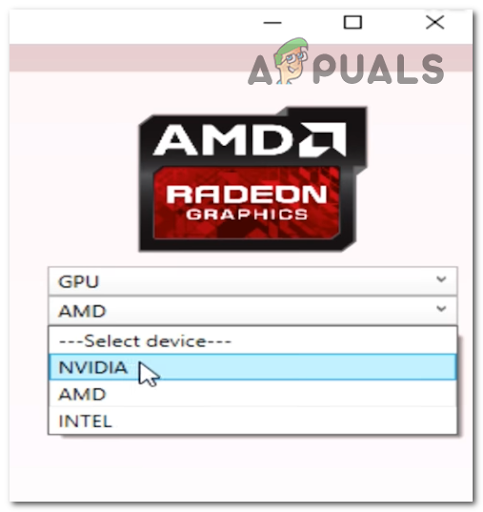
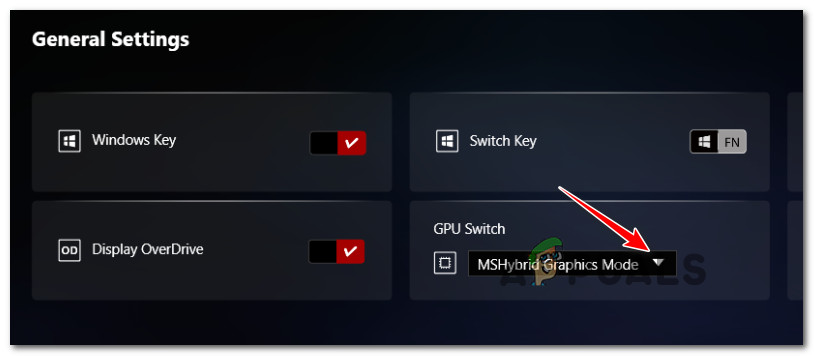
MSI Laptops
MSI laptops will use a proprietary tweaking software called MSI Dragon Center. This is the one tool that will allow you to disable Nvidia Optimus from kicking into action. To do so, open MSI Dragon Center and access the General Settings from the menu on the left. Next, move over to the right-hand pane and expand the GPU Switch drop-down menu, and set it to Discrete Graphics Mode. Note: If the GPU Switch menu is set to MSHybrid Graphics Mode, it means that Nvidia Optimus is enabled. Once you make this change, reboot your PC in order to allow the changes to take effect.
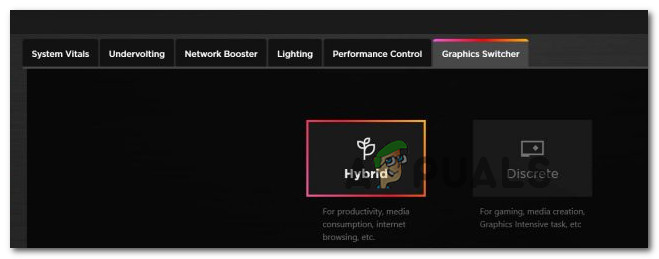
HP Laptops
HP is no stranger to forcing gamers to use their proprietary tools. In order to disable Nvidia Optimus from an HP gaming laptop, you need to install the Omen Gaming Hub software. Once you’re inside the utility, access the Graphic Switcher tab (from the ribbon bar at the top), then you’ll have the option to choose between Hybrid and Discrete modes. Hybrid means that Nvidia Optimus is Enabled while Discrete means that Nvidia Optimus is always Disabled as the dedicated GPU is always preferred. You need to choose Discrete. After you’ve made this change, reboot your PC in order to allow the changes to take effect.
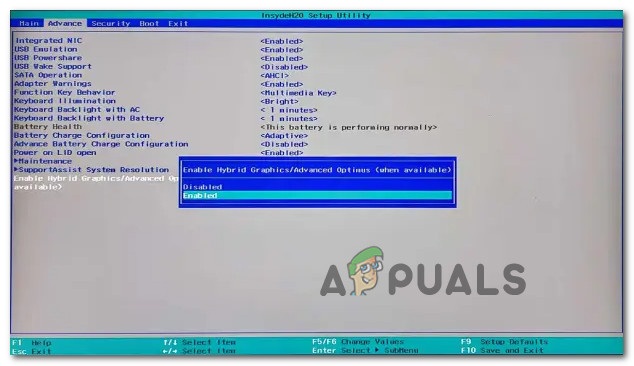
Dell Laptops
Unlike every other gaming laptop manufacturer featured so far, Dell does NOT have a front end software that will allow you to quickly disable the Nvidia Optimus functionality. The only way to do it if you’re using a Dell laptop is to boot into your BIOS (power on and keep pressing F2) as soon as you see the initial screen. Once you’re finally inside the BIOS settings of your Dell laptop, access the Advanced tab and set the Enable Hybrid Graphics / Advanced Optimus (when available) to Disabled. Once you’ve followed the instructions above, save the changes, then boot normally in order to allow your Dell laptop to enforce the changes you’ve just operated.
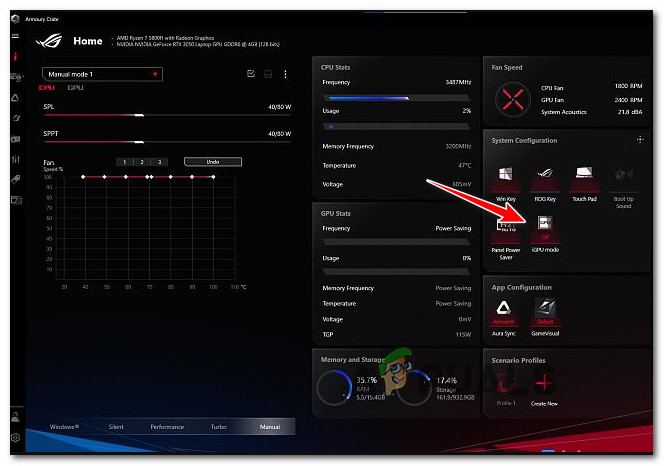
ASUS Laptops
If you’re using an ASUS laptop, you should install the ASUS Armory Crate Software (if you don’t already have it installed). This is the front-end software that will allow you to toggle Nvidia Optimus OFF in order to prevent it from conflicting with the NIS feature. Open the ASUS Armory Crate Software and go under the System Configuration section. From there, toggle the GPU mode to Discrete Graphics and away from Optimus in order to disable Nvidia Optimus. Once you’ve enforced this change, reboot your PC in order to allow the changes to take effect.
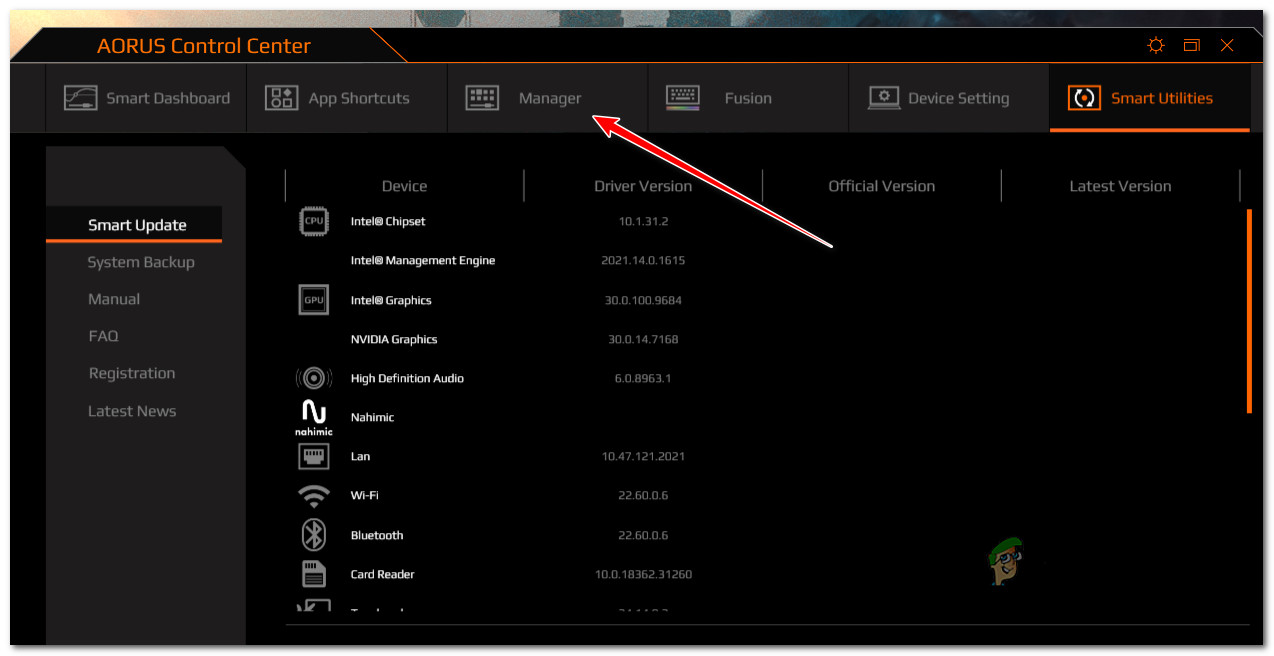
Aorus Laptops
Even if Aorus is a lesser-known gaming laptop manufacturer in the west, they do have proprietary front-end software that will allow you to freely toggle Nvidia Optimus On and Off. What you need to do is open the AORUS Control Center Software and access the Manager tab from the ribbon bar at the top. Once you’re inside the Manager tab, access the Graphic Switch option and change it to Discrete GPU in order to disable Nvidia Optimus. After you make this change and effectively disable Nvidia Optimus, a restart is required in order to enforce the new GPU behavior.
Alienware Laptops
Surprisingly, most Alienware laptops will not be able to use front-end proprietary software in order to disable Nvidia Optimus. This means that in case you’re using an Alienware gaming laptop, the universal way of ensuring that Nvidia Optimus stays Off is to access the BIOS settings. Do this by booting your computer and pressing the F2 key as soon as you see the initial screen. Once you have successfully entered the BIOS settings, access the Advanced tab from the menu at the top. Next, scroll down to the bottom of the screen and Disable the option named as Enable Hybrid Graphics / Advanced Optimus (when available). Once you’ve made this change, save the BIOS changes, then boot normally and see if the problem is now resolved.
Acer Laptops
If you’re using an Acer gaming laptop, the quickest way of disabling the Nvidia Optimus feature is to use the Predator Sense software. Open up the front-end software and click on the settings (cog icon) from the top-right corner of the screen. From the context menu that just appeared, ensures that the Discrete GPU Only setting is turned ON. Note: By enabling Discrete GPU Only setting, you’ll ensure that Nvidia Optimus remains disabled. After you’ve made this change, reboot your PC in order to allow the changes to take effect. In case disabling Nvidia Optimus did not work for you (or it was already disabled), the only option left is to try an alternative to Nvidia Image Scaling.
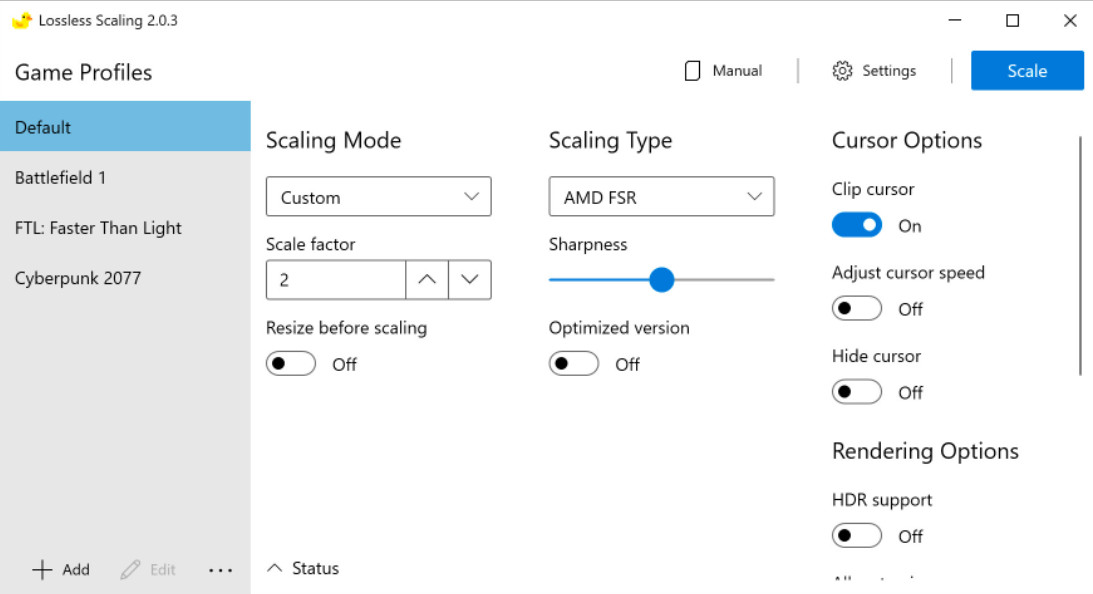
ALTERNATIVE: Use a Lossless scaling app
In case none of the methods above have worked or NIS is not directly available due to our motherboard, one alternative is to use an app like the Lossless scaling app. Note: This app lets you scale windowed games to full screen using the same technology made available via NIS (Nividia Image Scaling). Its’ particularly effective when having to do spatial scaling, pixel art scaling, and algorithm-powered sharpening. This app is available via Steam and it’s the perfect alternative if NIC is not available natively. But, as with everything, there are a few drawbacks:
The app consumes more resources and will take away some FPS from your games. This scaling solution is basically identical to NIC, but it’s not happening on the driver itself which means that the performance will be lower. The app is only available as a free trial – if you want to use it indefinitely, you’ll have to pay $3.99.
How to Enable Nvidia Image Scaling (NIS) for Higher FPS in Games?Fix: Disable Display Scaling on High DPI Devices in Windows 10What is GPU Scaling? and How to turn it on?FIX: “(Application Name).exe – Bad Image” is either not designed to run on…