A lot of root guides on the internet offer help for rooting, but they usually miss out a lot of set up steps that are vital for the rooting process. This guide will help you learn how to root the LG G4 on Marshmallow easily, from factory default to rooted and ready to roll in under an hour. There’s a lot to cover so let’s get right into it! Make sure to follow each step precisely as explained below and you shouldn’t run into any problems.
Step 1 – Find Out Your LG G4 Software Version
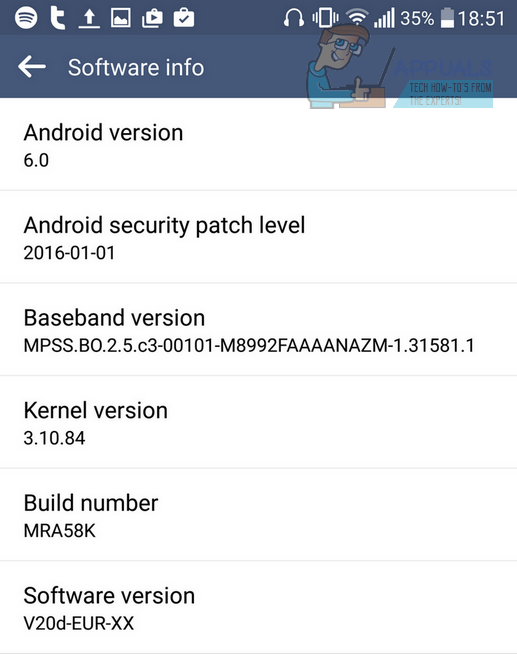
For this first step you will need to locate your software version so that you can download the correct kernel. To do this on your G4, head to settings, then ‘About Phone’, then ‘Software Info.’ In the LG G4 we used for this guide, we had a software version of ‘V20d-EUR-XX.’ Make note of this.
Whilst you’re here, tap the Build Number option 7 times. This will enable developer options in the settings menu, which will be needed in the following steps
Step 2 – Download The Corresponding ROM
Next, take your software version and take the first two numbers and following letter. In our example(V20d-EUR-XX), it would be 20d. Your version may be 20a, 20b, 20c or 20d. Follow the link to the correct custom ROM below. Version 20A Version 20B Version 20C Version 20D
Step 3 – Install ADB and Fastboot
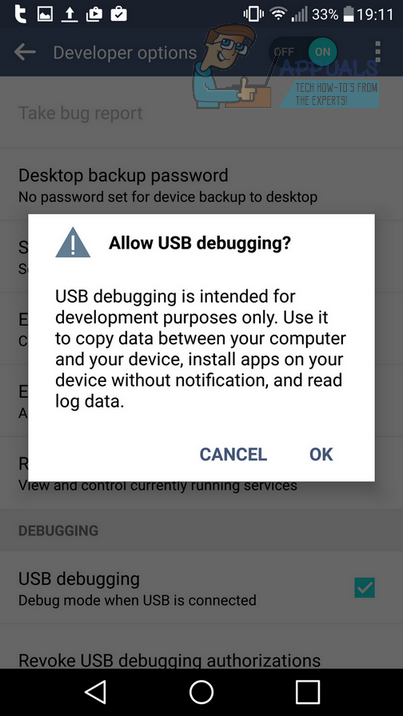
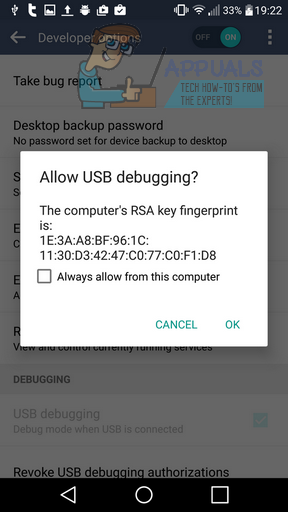
For this step, you will need to install ADB and Fastboot onto your PC. First though, grab your LG G4, head to settings, then visit the developer options (under system). Ensure developer options is turned on and check the USB debugging box. Press OK to the pop-up prompt.
First, connect the LG G4 to your PC via USB Accept the prompt on your LG G4 to download the PC drivers if you haven’t done so already Once installed, or if already installed, accept the next prompt to allow USB debugging
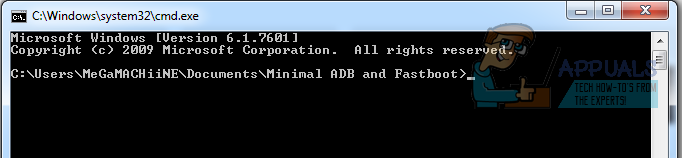
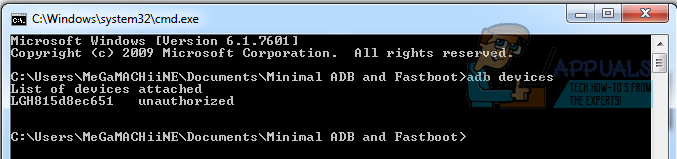
Next, download Minimal ADB and Fastboot here Go through the installation Wizard and install in an easy-to-access location Tick ‘Launch Minimal ADB and Fastboot’ on the last step of the installation A command prompt will open up as shown below
Next, type ‘adb devices’ into the command prompt. You should see your device like below if you have correctly followed the steps above. If it did not appear, try repeating the steps above and ensure you have installed the LG PC drivers.
Step 4 – Unlock Your Bootloader
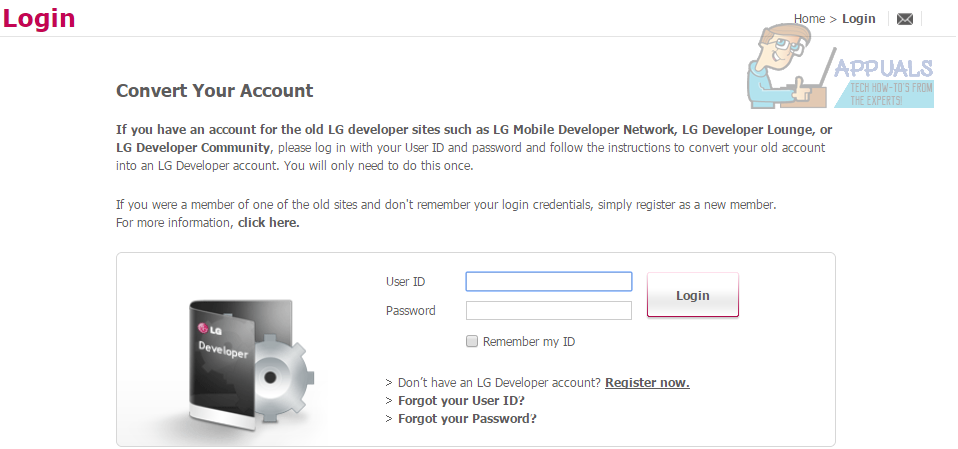
For the next step, you will need to unlock your bootloader. This is so that you can install TWRP later and flash the ROM file. To unlock the bootloader, you will need to visit the LG developer website and create an account. Head to the bottom of the screen and click ‘Starting Unlocking the bootloader’
Next, create an account on this page.
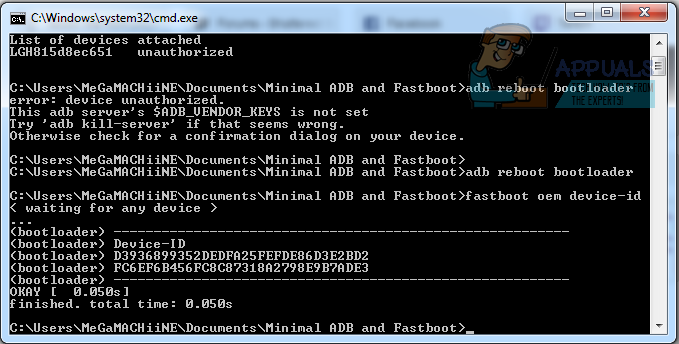
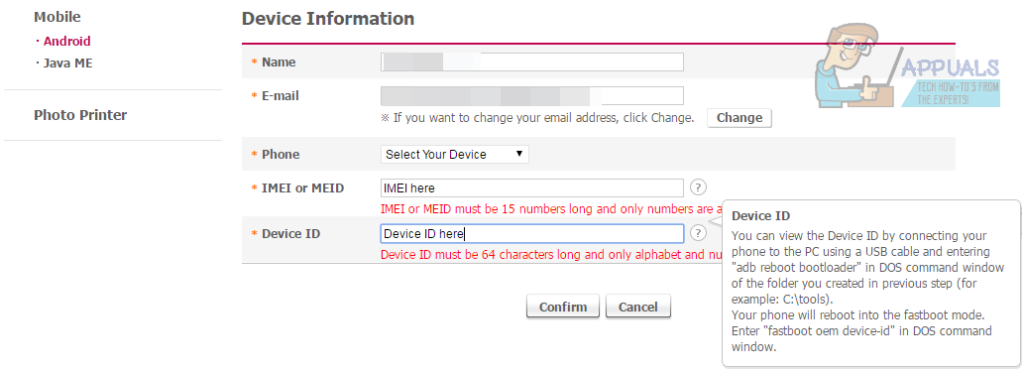
To register, follow these steps: Click LGE Developer Member Registration Accept terms & Privacy Hit OK On the next page, fill in the details with a valid email address Finish the sign-up process & confirm your email Next, log-in to the LG website Visit this link again Scroll to the bottom and click ‘Starting Unlocking the bootloader’ For this next step, you will need two pieces of information. The first can be found within the Minimal ADB and fastboot tool. Ensure your LG G4 is still connected via USB Open up the ADB and fastboot cmd window and type ‘adb reboot bootloader’ Your LG G4 will reset Once your G4 has reset, type ‘fastboot oem device-id’ Right click, mark and highlight the two strings under Device-ID. Press Ctrl + C and then paste the two strings into a notepad You should end up with one long single string of numbers and letters. Type ‘fastboot reboot’ to finish this process
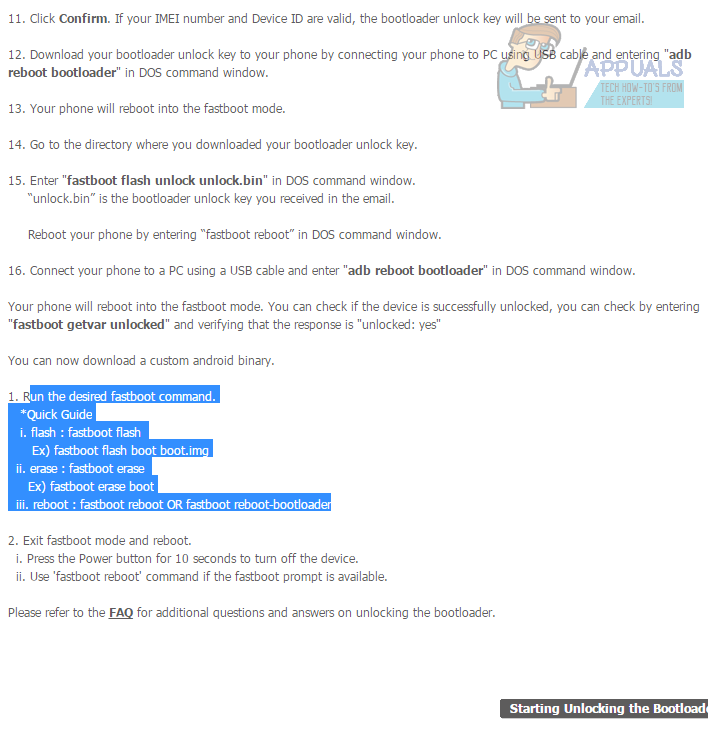
Next, when your LG G4 has rebooted, grab your LG G4 Head to Settings > About phone > Status Make note of your IMEI. Then, enter the IMEI and device ID into the corresponding boxes on the LG developer website Select the correct model number for your LG G4. Click confirm
Visit your email address and download the provided unlock.bin file Place the unlock.bin file in the directory that contains the fastboot and ADB files Now open up Minimal ADB and fastboot again Ensure your LG G4 is still connected by typing ‘adb devices’ If connected, type ‘adb reboot bootloader’ Your LG G4 will restart Once restarted, type ‘fastboot flash unlock unlock.bin’ Your bootloader will become unlocked and all internal files will be deleted!
Step 4 – Install TWRP & Flash The ROM
Next we will install TWRP for flashing the rooted ROM onto your LG G4. Visit this link Download twrp-3.0.2-0-h815 Save the file in the directory that contains ADB and fastboot Now open cmd prompt and type ‘fastboot flash recovery twrp-3.0.2-0-h815.img’ Wait for the cmd prompt to flash the file Next, type fastboot reboot to reboot your LG G4 Disconnect the LG G4 from the PC Go through the initial setup process on the device Head into Settings > About phone Tap build number 7 times to re-activate developer options Enable USB debugging Reconnect the LG G4 to your PC Transfer the previously downloaded ROM file from step 2 to your LG G4 internal memory Now open ADB and fastboot once more In the cmd prompt, type ‘adb reboot recovery’ Your LG G4 will now boot into the recovery screen. From here, tap install, then locate the ROM file you previously moved over. Next, swipe to confirm the flash. Your device will now install the ROM and will become rooted. To check root access is successful, install the SuperSU application from the Google Play Store and go through the setup process.
How To Get Marshmallow on Samsung Galaxy Tab SHow to Root Bluestacks on Windows Easily?Fix: root User’s Home Directory is /rootHow to Root Your Nexus Phone using CF-Auto-Root